What He Wore: BOY style {kind of}

Wednesday, February 29, 2012

Between soccer games all weekend, my little guys being sick, and getting ready for my upcoming trip, there was absolutely no style going on in this house - unless you consider jammies and polyester soccer uniforms stylish. So I've decided to put together a post of things that I would love to hang in Finley and Oliver's closet. Moms of boys, be prepared  - this is some seriously cute stuff.


Fox hoodie from Elise Hooper Designs
Out to Play sweatshirt from Tantrums 
Robin sweater from Christopher Fischer
Pepe the Pirate tee from b. children's wear


Skinny jeans from Zara
Green pants from H&M (only $9.95 and available in a ton of colors!)
Linen trousers with braces from Zara


Ray-Ban sunglasses from J. Crew (my boys would likely destroy these but they are so cute!)
Simple Slip Converse from Nordstrom
Teal Cord Tiny Toms from Toms
Kids' stripe band trilby hat from J. Crew

I told you. Super cute.

DIY Puffy Cloud Mobile

Tuesday, February 28, 2012
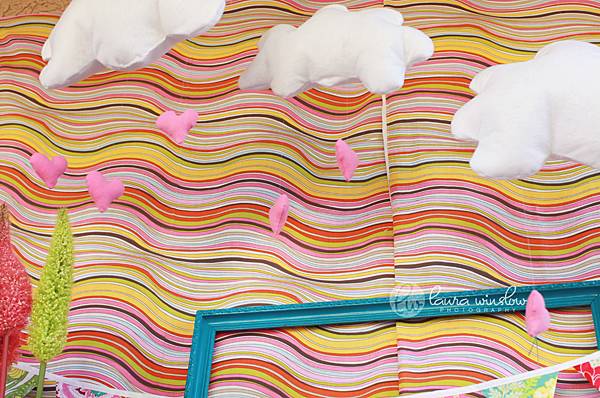
A couple of weeks ago, my friend Laura asked me if I could make something similar to the adorable clouds featured at a party by Little Pear. Laura's daughter loves Peppa Pig so Laura threw her a Peppa Pig/Muddy Puddles themed party and the clouds fit in perfectly.


Not only is Laura a crazy talented photographer, but she puts together the most amazing parties for her kiddos that I have ever seen. She gets all the details perfect and the kids always have a blast. This party was no exception. I mean, look at that dessert setup! So flipping cute!


{Party photos and amazing party styling via Laura Winslow Photography}

 Aside from super cute party decor, I think these cloud mobiles would look adorable in a child's room. I hung this up in Oliver's room to take a picture and he was so bummed when I had to take it down.


Anyhow, these were pretty easy to make so of course I had to document the process for you all. 

What you'll need:
  • Fabric for clouds and hearts - I used eco-fi felt for the cloud and flannel for the hearts
  • Fiber Fill
  • Monofilament (fishing line)
  • Sewing Machine
  • Needle and thread
  • Pattern for cloud (I taped 4 pieces of paper together and drew a cloud - super easy)
  • Pattern for heart (draw a heart or grab one from the internet)
 
Getting Started:
Tape 4 pieces of paper together and draw a cloud on it. Cut it out. I made 3 clouds for Laura so I made 2 cloud patterns in slightly different sizes. Cut your pattern out.


Fold your fabric or felt in half. Pin the cloud pattern on and cut it out.


Draw your heart or print one off from the internet. Cut it out and trace it on the fabric you'll be using for your hearts (make sure to fold your fabric in half first so you'll have 2 sides for each heart). I made 3 hearts for my larger clouds and 2 hearts for my smaller cloud.


Cut the hearts out.


Pin the 2 sides of your cloud together and sew about a 1/4" in. Make sure you leave an opening large enough to flip it right side out.


Flip your cloud right side out and use scissors (or chopstick, etc) to push out all the edges.


Stuff your cloud with fiber fill. You'll want it fluffy but not so fluffy that you can't sew the opening closed.


To close up the cloud, fold the edges in a bit and do a simple whip stitch to sew it closed. (If you're wondering what the heck a whip stitch is, click here.)


You're all finished with the cloud now and ready to start the hearts. Pin the sides of your hearts together and stitch about 1/8" in. Again, be sure to leave an opening large enough to turn them right side out.


Flip your hearts right side out. At this point, I turned the open edges in and ironed the hearts. Stuff with fiberfill.


Using the same whip stitch, stitch your hearts closed. My hearts look a little wonky but I think it adds to the charm.


Now take a length of your monofilament and thread it through a needle. Tie a knot at the end and sew through the top center of your heart.


Now take the needle and sew through the cloud where you want your heart to hang. Knot it. Do this for all of your hearts.


The last step is to thread a long length of the monofilament through the top center of your cloud so you'll have something to hang it with. And that's it. Done. 


Let me know if you get stuck! finleyandoliver@gmail.com

What He Wore: BOY style

Thursday, February 23, 2012

I am excited to introduce you to our super cute guest for {BOY style} this week! Meet Gavin - 2 years old. This little guy belongs to Nancy over at Rabbit and the Piggie. Nancy snapped these pictures of her cutie showing off some serious style at their local farmers market. Look at how he rocks that fedora!! So flippin' cute.


Fedora: Farmers market vendor
T-shirt: Carters
Shorts: Loehman's Kids (where have I been? Loehman's *kids*?!)
Shoes: Little Me (hand me downs from big sis)

Thanks so much for sharing your fun style with us, Gavin! And thank you Nancy.

*If you are interested in showing off your little guy's style, please email me at finleyandoliver@gmail.com*


DIY Appliqued St. Patrick's Day Tee

Tuesday, February 21, 2012
I meant to get this posted a couple of weeks ago but I am swamped and time got away from me. So sorry about that. This little applique is *super* easy. Perfectly simple and cute for a St. Patrick's Day tee (or onesie, tank, etc.)

(If you are sick to death of my applique tutorials, check back next week. I'm working on the cutest decorations for a birthday party and I'll be sharing the tutorial soon.)


Materials
  • Blank one piece, t-shirt, tank, etc. (pre-washed for shrinkage)
  • Felt or fabric for appliques - if you are using felt, I strongly recommend eco-fi felt by Kunin. It's made from recycled bottles and holds up really well in the wash.
  • Heat n Bond or other fusible webbing
  • Scissors
  • Embroidery floss and needle (or you could sew by machine)
  •  Shamrock template - free one for personal use here 


Getting Started 
 (Since I use Heat n Bond, my instructions will follow Heat n Bond's instructions. If you are using a different fusible web, simply change out my instructions with the instructions on the package.)

Print out your template and place it underneath your fusible webbing. Trace the design onto your fusible webbing. If you are going to put a heart on your tee, just free hand one onto your fusible webbing (don't draw it on the shamrock - draw it next to it).


Next you'll want to iron your fusible webbing onto your felt or fabric. For Heat n Bond, set it on the "wool" setting (NO STEAM). Iron the design onto the felt or fabric for about 3 or so seconds so it looks like this: 


Cut out your appliques. Take your appliques and peel off the wax paper layer from the back. Place the shamrock exactly where you want it on the t-shirt with the glossy/fusible webbing side face down. Iron the applique on to the t-shirt pressing for about 10 seconds. I like to use a scrap piece of fabric over the applique when I press it just to be safe. Again be sure to use the wool setting with no steam. Check to be sure that the applique is firmly adhered to the shirt.


Take the heart and place it where you want on the shamrock. Iron it using the same steps above.


Now that your love is attached to the t-shirt, you're ready to start the applique process. You can do this with a machine or by hand. To stitch by hand, cut about 3-4 feet of your embroidery thread. Your skein of thread will have six strands. Separate two of the strands from the piece you've cut and thread them through your needle.

For this t-shirt, I used a straight stitch. It's a basic stitch and great for a beginner. You basically bring the needle up through the t-shirt and back down making straight little stitches about 2 cm in from the edge of your applique. 
Sew the shamrock first and then follow up with the heart. I'll admit that I didn't have a chance to stitch the heart - I ran out of white embroidery floss!! It's on the list for my next supply run.
If you get stuck, comment here or message me at finleyandoliver@gmail.com. And don't forget to check back next week for a new tutorial (that has nothing to do with applique!). ;)

Trevor Dayley Photography Workshop: Recap

Monday, February 20, 2012
This past Saturday, I had the pleasure of taking an all day photography workshop with Trevor from Trevor Dayley Photography. Trevor is not only an amazing photographer with a clean, beautiful, and classic style but he is also a great instructor - approachable, energetic, knowledgeable, and funny.  It was an amazing day packed full of practical and useful information. 

About half way through the workshop, Nicole Randall (who is also a talented photographer and gorgeous model) stopped in so we could photograph her for a while.

(Some of the angles are a little wonky because there were about 20 of us photographing Nicole at the same time and I shot from wherever I could squeeze in.)


This was such a fun and inspiring experience for me. I would highly recommend one of Trevor's workshops if  he ever offers one in your area (he is quite the globe trotter).

In the meantime, be sure to stop by his website to view his work. Give yourself some time - it is amazing.

What He Wore: BOY style

Wednesday, February 15, 2012

My Finley loves hamming it up and having his picture taken but he wears a uniform five days a week so Oliver is my model for boy style. Poor guy hates having his picture taken. I can usually bribe him - today, a lollipop did the trick but even then, he wasn't feeling it. Still pretty cute though, right?


Hat: H&M
Scarf: Zara Kids
T-shirt: Finley and Oliver (learn how to make your own here)
Cardigan: The Tiny Hiney
Shoes: Target (they are girls shoes but we switched out the laces)

**Eventually I'd love for my readers to help me out with Boy Style by submitting photos that show off your little guy's individual style. I'm sure Oliver would appreciate the break ;)  If you'd be interested, message me at finleyandoliver@gmail.com.**

London Bound

Monday, February 13, 2012

My best friend and I are leaving for a trip to London in three weeks.

 
Tea Towel by Maria Dahlgren

Leslie and I adore London and have always talked about taking a girls trip there together. It was during the Royal Wedding (maybe it was the hats?) this past year when we called each other up and decided to make it happen. 

Image via Racey Tay

I've been to London several times but haven't been back since we started our family five years ago. We've both seen the touristy stuff and want to get more of an insiders/off the beaten path view of London this time. 

Image via Stuck in Customs

We will only be there for five days (staying in Kensington) and aside from a mandatory visit to the Tate Modern and the theater, we don't have any set in stone plans. So I'm appealing to any of you who are lucky enough to be familiar with my favorite place ever...what are your must sees/dos in London? Fabulous restaurants? Pubs? Markets? Places to have a drink? Favorite place to shop or window shop? Parks? Galleries?

Image via Kezzi Rose

I would be forever grateful for any of your tips and will have a pint (or two) in your honor while there.