I know you can buy bunny ears at the dollar store or Target for super cheap. But honestly, they aren't nearly as cute as these that you can make yourself. Bust out your own pair of ears for just a few dollars and little bit of time.
What you'll need:
Felt in two different colors (I used wool felt but you can easily use eco-fi felt too)
Thin plastic headband (bought mine at the local drug store)
Wire
Sewing machine *or* embroidery floss and needle
Bunny ear template
Getting Started:
Cut out the bunny ear templates. Pin them to your felt and cut out. You'll need to cut two of the large ones per ear (four total for a headband) and one per ear of the little ones (two total for each headband).
Take the small pieces and pin them to the inside of one large piece. Make sure you pin them at least an inch up from the bottom .
Sew the small inner ear piece to the outer ear. You can either machine sew or hand stitch. I made one pair with my sewing machine and the other pair by hand stitching. Do this for both ears.
Take the other two large pieces and pin them to each of the ears. Machine sew or hand stitch them together. Be sure you DON'T sew the bottom of the ear (as indicated on the template). You need at least an inch at the bottom to wrap around the headband (indicated a few steps below) so keep it open.
Cut a 9" length of your wire. Honestly, I think that even pipe cleaners would probably work for this (although I haven't tried it). With pliers or scissors, make a loop/circle at the top of the wire so it won't poke through your ear.
Place your ear over headband. Then open end of your felt ear should hang over each side of the headband an inch or so.
Wrap the extra length of wire around the headband. It doesn't have to be perfect but it will help hold the ears up and in place.
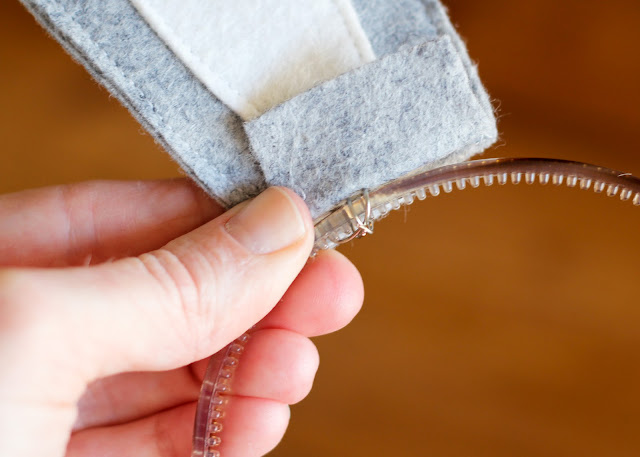
Now take the flap of felt in the back, fold it up and under the front flap. Sounds confusing but this picture should help. Easy peasy.
Take the remaining flap of felt in the front and wrap it under and around the headband. (If your flaps of felt aren't long enough to wrap around the headband, just take a seam ripper and rip up a few stitches on each side).
At this point, you can either hot glue the flap down or stitch it close with a needle and thread. I stitched it closed.
Do all of those steps from the wire on for the second ear and you're finished. This little project goes pretty quick. I made both pairs (one of them was hand stitched) in under 30 minutes.
And just look how much the boys Finley loved his ears!
I don't blame Oliver for being miffed. What kind of mom makes a kid pose in bunny ears on his 4th birthday?? He eventually came around.
I don't know that I explained the steps very well (I'm kind of in a post 4 year old birthday haze) so feel free to message me or comment here if you get hung up on a step.


7 comments:
WHAT?!? Oliver is 4??!? How can that be? wow... I am just blown out of the water :0
those ears are so cute...man I can barely type I am still in shock!
I know! This kid is growing up FAST!!
Hahaha!! LOVE Fin's faces!! These are just awesome, Gracie!!! Fab tutorial!!!
Whoa! Happy Birthday Oliver!!!!!! I think you are such a fun mom! Those ears rock!
Thanks, friends! These guys are total goofs.
Adorable! Thank you!
Thank yoouuu , lol I am using this tutorial to mkae the ears for the March hare in Alice In Wonderland! #APEnglishProbs
Post a Comment