Week 3 With the Chicks

Thursday, September 29, 2011
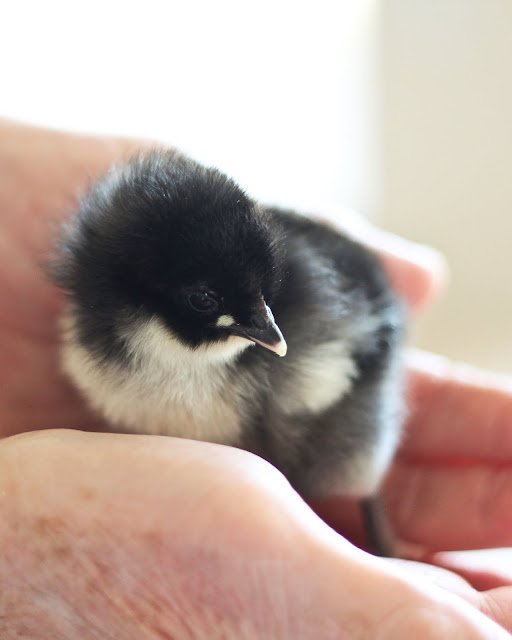
The chicks are three weeks old now and are starting to enter the awkward phase. They are quickly losing their fuzz and feathering out. Although they are still a ton of fun, they are getting louder and smellier and I'm anxious to move them outside in a couple of weeks.

Cookie

Minnie

Lottie

And Francie.

And speaking of chickens...Phoenix area locals who raise chickens, are interested in raising chickens, or just like to chat with fun and friendly folks, mark your calendars! This year's Phoenix Tour de Coops is going to be held on December 3rd.

Keep an eye on the Valley Permaculture Alliance website for more information.

DIY Appliqued Love Tee

Monday, September 19, 2011
One of my most popular Finley and Oliver tees was my little love tee. I'm making a love one piece for a friend's baby and thought I'd document the process and turn it into a tutorial. 


With a little practice and patience, making this little one piece (or tee or tank, etc.) is super easy. It makes a precious gift or cute little piece of clothing for your kiddos. If this is your first time appliqueing, this project will take you about an hour.

You'll need the following:

blank t-shirt, one piece, or tank
felt or fabric piece for the applique (I prefer to use eco-fi felt by Kunin - it holds up great in the wash)
 embroidery floss
scissors (small scissors with a pointy tip work best)
fusible webbing (I prefer to use heat 'n bond)
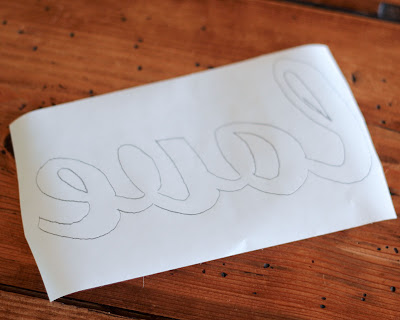
 template for the applique (download here)


(The template is backwards because the image will be reversed once you've put your applique together. This is important to remember any time you are appliqueing numbers and letters - not so much when you're appliqueing other things.)

Since I use Heat n Bond, my instructions will follow Heat n Bond's instructions. If you are using a different fusible web, simply change out my instructions with the instructions on the package. If you have any questions, don't hesitate to contact me and I can help you.

The first thing you'll want to do is take your love template and place it under a sheet of your fusible webbing. Take your pencil and trace love on to the webbing so it looks something like this:


Next you'll want to iron your "love" webbing onto your felt or fabric. For Heat n Bond, set it on the "wool" setting (NO STEAM). Iron the design onto the felt or fabric for about 3 or so seconds so it looks like this:


Carefully cut the applique out. This applique is a bit detailed so having small, pointy tip scissors will come in handy here.


Take the applique and peel off the wax paper layer from the back.


Place the applique exactly where you want it on the t-shirt with the glossy/fusible webbing side face down. Iron the applique on to the t-shirt pressing for about 10 seconds. Again be sure to use the wool setting with no steam. Check to be sure that the applique is firmly adhered to the shirt.

Now that your love is attached to the t-shirt, you're ready to start the applique process. You can do this with a machine or by hand. I'm a hand stitcher  - I find it very relaxing and therapeutic. To stitch by hand, cut about 3-4 feet of your embroidery thread. Your skein of thread will have six strands. Separate two of the strands from the piece you've cut and thread them through your needle.

For this t-shirt, I use a straight stitch. It's a basic stitch and great for a beginner. You basically bring the needle up through the t-shirt and back down making straight little stitches about a 2 cm in from the edge of your applique. 


A great video tutorial for the straight stitch is available here. The nice thing about sewing coordinating thread (floss) on felt or fabric is that it's hard to see so it's very forgiving if you're a beginning stitcher. If you're an experienced hand stitcher, it is fun to experiment with contrasting threads and different stitches.


Once you've finished stitching, you are done! Super easy, right?? Sky is the limit now! You can take these same principles and try out different fonts, words, animals, etc.


If you give this a shot, I'd love to see the results! Please take a picture and email me at finleyandoliver@gmail.com. And again, if any of you get stuck, please don't hesitate to email me for help.

Baby Chicks - Day 2

Thursday, September 8, 2011
The chicks survived their first day with us and are fitting in nicely. Aside from a little pasting up for Francie (poor thing was traumatized when I cleaned her up), things have been smooth. Since they will start feathering and going through an awkward phase in just a couple of days, Oliver and I had a little photo shoot with them while they are still fluffy and adorable.


So incredibly cute! Aren't they?


Francie is still my favorite. She is the friendliest (so far) and I absolutely love her little neck. Finley likes her too but he's afraid to hold her because of her feathers (or lack thereof). ;)

The chicks have arrived!

Wednesday, September 7, 2011
I got a call early this morning from the post office that a box had arrived for me that was marked "live animals" and was making noises. Oliver and I high tailed it over to pick our special delivery up. The chicks came all the way to Arizona from Connecticut (1 day express) which seems like a pretty hefty trip for these tiny things. Because of this, I'm always a little apprehensive opening the box in case one or more didn't make it. Fortunately, the box was very loud and I could feel the girls moving around inside.


We carefully opened the box and found our newest little pets all snuggly and sweet inside.


Meet Lottie the buff orpington


And Cookie the black australorp


And Minnie the silver laced wyandotte (Can you tell Finley named this one? Although I'm sure I don't spell it the way he'd want me to)


And my personal favorite...Francie the naked neck. 


Once we got the girls unpacked, we carefully placed them into the brooder which will be their home until they are fully feathered (around 6 or 7 weeks) and ready to move outside.


They immediately dove into their food and water and filled their little bellies until they could hardly stand up. These girls are pooped out! Francie (the naked neck) could hardly hold her head up she was so exhausted.


The girls have a heat lamp in their brooder (which is why the photos have a red tinge) that will keep them at a warm 95 degrees for their first week. They all huddled together and had a nice, well deserved snooze. Again, poor Francie is face down in the pine shavings.


So far, they seem to be adjusting really well. They are well protected under the watchful eye of Sodapop. She won't get her first (supervised) face to face meeting with them until they are older and bigger. She's great friends with the big girls but these little ones might be a bit too tempting.


We are excited to have little chickies around again. I forgot how cute and tiny they are! My next task is to do some more research and come up with a plan of action for introducing them to the existing flock when the time comes. That part makes me really nervous... if anyone has any experience with that, I'd love some tips.

Unofficial Chick Week

Tuesday, September 6, 2011
We are celebrating chick week at our house. Our newest girls should be hatching sometime today or tomorrow and will arrive all bundled up in the mail on Thursday or Friday. We've spent the past few days getting the brooder and all of the supplies ready for them.

In honor of their upcoming arrival, I'm sharing my latest and greatest pins from my Fowl Friends board on Pinterest.


fresh eggs sign (I'm definitely getting this!) by William Dohman
brown eggs photo via hindolbettern
basket of eggs and wellies via meggielynne
chicken and bunting via dottie angel

Will update with pictures when the newest flock members arrive.