A Giveaway with The Tiny Hiney!

Wednesday, September 29, 2010
Alright everyone, I am doing my first ever blog giveaway with The Tiny Hiney! If you haven't yet discovered the awesomeness of The Tiny Hiney, you definitely don't want to miss out on this. The Tiny Hiney was created by two moms with a passion for fashion for little ones. Their designs are unique, stylish and modern and the quality of their clothing is second to none. My boys have the Tiny Hiney cardigans and beanies and we absolutely love them - fun, fashion forward, and so stinkin' soft! 
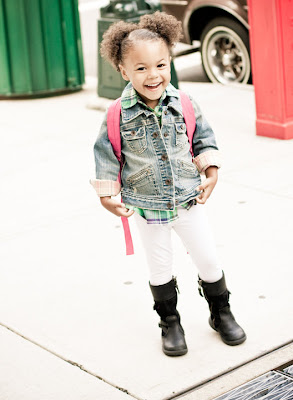
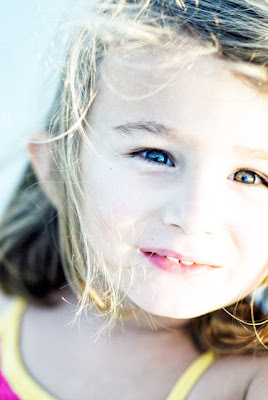
The gals behind The Tiny Hiney have generously offered to let the winner of this giveaway choose the item of their choice {for free} from their available stock! Giveaway details follow these ridiculously cute pictures by Chelsea Elizabeth Photography.


In addition to the giveaway, they have generously offered a 20% discount at The Tiny Hiney for my readers through the month of October! Use the code "Grace" at checkout.

Giveaway details:

The giveaway will end at 11:59pm PST on Wednesday, October 6th and the winner will be announced on Thursday the 7th. I will forward the winner's contact information to The Tiny Hiney gals and they will be in touch with you to choose your super rad Tiny Hiney item.

You have up to *FIVE* different chances to enter. Please leave a separate comment for each one that you do:
  • Visit The Tiny Hiney - come back here and leave a comment with your favorite item on their site.
  • Follow this blog (Finley & Oliver)
  •  Tweet this giveaway
  • Post a link to the giveaway on FB
Gorgeous photos property of Chelsea Elizabeth Photography and The Tiny Hiney

Family Pictures...Only Better! {The Momtographers}

Monday, September 27, 2010
Adrienne Gray and Krista Njapa are equal parts talent, class, smarts, and style. When I first heard that they were collaborating on a project together, I knew it would be nothing short of amazing. They did not disappoint. Last year, they launched the hit website The Momtographers - a site dedicated to helping moms (and pops too) improve their photography skills to create beautiful lasting memories.  I recently had the opportunity to ask Adrienne some questions about The Momtographers and asked if she'd be willing to share a tip or two with my readers. 


Tell me a little bit about The Momtographers and how it came to be. The Momtographers is a community of moms who love to celebrate our kids’ lives through photography.  Our aim is to help inspire, instruct and encourage moms to take pictures as incredible as their kids.

Krista Njapa and I met online while expecting our first daughters (who were born three days apart!).  Both of us had professional backgrounds that involved visual arts, but neither of us truly understood the importance of a camera until we held our little ones.  Then it was all pictures all the time... Except for one picky thing.  The dark and out of focus snapshots we were taking looked nothing like the pictures we saw in our heads and on other mommy blogs.  “The Momtographers” came to be after a couple of years of trying to figure it out on our own – we really wanted to save other moms the time (and frustration!) by helping them figure out how to take pictures that are truly worthy of the memories they set out to capture.


How long have you and Krista been involved in professional photography and what motivated you to get serious about your snap? I’m a video producer, so I’ve been involved with image capture for a number of years – though I typically hired the folks that set up the lights and run the cameras, so I didn’t have a ton of experience since I was rarely the person behind the camera. So when my husband gave me my camera a few days before my daughter was born, I had decent instincts and a basic understanding of what made things work visually, I just didn’t understand how to translate that to my still camera.  As I started to get my feet under me, I had people offer to hire me professionally to take photos of their kids but it just never felt right.  I couldn’t bring myself to charge someone for something that I knew was so precious to them – I wanted to teach THEM how to take their own pictures.

Krista actually has more professional photography experience than I do.  Her background is in marketing, so she had good built-in instincts as well.  But after she had Chloe, she took the bull by the horns and started apprenticing for commercial shoots in New York City. Before long she was producing shoots as well. But we both recognize that most new mommies don’t have the professional opportunities or time otherwise to get serious about their hobby, so we want to help them with that!


What type of camera do you use? Lenses? I (Adrienne) use a DSLR camera – a Nikon D200.  I like to use prime lenses when I’m in a controlled environment like around the house or somewhere I’m familiar with. Prime lenses are great because they offer a wider aperture which works great with natural light indoors. I have Nikon 50mm 1.8 and an 85mm 1.4.  But the drawback to prime lenses is that your butt is the zoom – you have to physically move back and forth with the camera to frame your shot.  When we’re in an unfamiliar location when everything’s happening quickly or I need to be more concerned about everyone’s safety than backing my butt up to get the shot, I use a zoom lens.  It’s a Sigma 17-70mm  2.8-4.5.


I asked Krista about her most recent camera combo and found out she uses a Canon 40D and a 50 mm lens, a 1.4. “I love the combo and can't complain as it's given me some amazing shots, but I do realize more and more especially recently that my camera bag could use a little bit of variety. I am a minimalist when it comes to equipment. And I think at the heart of the Momtographers philosophy is a minimalist approach, kids (especially young ones) come with enough gear, LOL! I shot with my sony point and shoot in manual for a long time, until I was lucky enough to have a Canon Rebel loaned to me. I shot with just that and the kit lens for over a year, until I finally upgraded to a 50 mm 1.8 lens ($89!!!). Eventually I had to give that camera back, and now I have the 40D, I also upgraded slightly to the 1.4 when my other lens literally fell apart in my hands at ChloĆ«'s 3rd birthday. I definitely see a zoom lens in my future!” 


What is a common mistake that novice photographers seem to make most often? Over doing it!  We’re not huge fans of posing the kids (i.e. the baby in the teacup) or otherwise adding things to photos to make up the story. That’s not to say that we don’t ask the kids to look at the camera, but we’d prefer to focus on the nuances of what’s already happening, and letting that environment tell that story.  Are you outside with the muchkins?  Take a picture of their feet in the bright green blades of grass.  Or if you’re at the beach and you just HAVE to get that shot of the kidoo perfectly posed in the sand, that’s great – just make sure to get some of them running in the tide afterwards!  In the end, it’s the authentic moments you’ll treasure most!


If you could give one crucial piece of advice to someone who is looking to sharpen their photography skills, what would it be? Learn all about natural light.  In our “Brand Spankin’ New” tips we advise that you find the pockets of light in your home that work consistently.  Once you practice there, you’ll begin to recognize other places that work too.  Find your safety zone and then experiment –it’s the best way to learn!

Also – TURN OFF YOUR FLASH!


Any fun and exciting things we can be looking for at The Momtographers in the coming year? Yes!  We’re launching our Digital Darkroom soon for tips and tricks on digital editing.  We’re very excited about that!  We’re also appearing in some fun publications soon. Since our launch in January, we’ve been taking our time to make sure we listen to what our community members really need, so hopefully we’ll keep growing in ways that stick to our motto – Family Pictures... Only Better!


Thanks so much to you Adrienne for sharing with us! If you all haven't checked out The Momtographers yet, head on over there now. It is exploding with practical, easy to understand information and tips for novices to the more experienced photographer.

All photos in this post are property of The Momtographers.

Busy x 2!

Sunday, September 26, 2010
Please forgive me for being totally MIA this past week. I have been busy helping and preparing for the homecoming of these two cuties!!


Meet my newest nephews! I am absolutely head over heels in love with these guys. 

In the meantime, I have been working on a fabulous blog post that will be up tomorrow. For anyone who is looking to sharpen their snap and improve their photography skills, you don't want to miss out. Be sure to check back tomorrow!

My little piggy bank

Wednesday, September 15, 2010
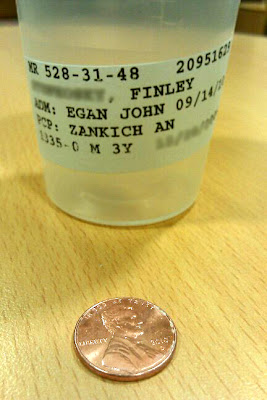
Finley decided to turn himself into a human piggy bank yesterday. He woke up from his nap complaining of stomach and back pain. After about 30 minutes of this, he told me that he swallowed a penny. Seriously. I'd expect that of Oliver but not of Finley. We took him over to an urgent care and they located the penny stuck in his esophagus. So, we headed over to Phoenix Children's Hospital for surgery. Fun times.


They put the little guy under and fished out the world's most expensive penny.


Finley was a trooper and is back to his normal silly self today. I guess we'll have to start feeding him dollar bills from now on.

Preparing for our fall garden

Monday, September 13, 2010
Although it is still crazy hot here in Arizona, the temperatures have dropped enough (to a cool 100 degrees), that it's time for us to start working on our fall garden. A while back we tested our soil and found that our levels were way off so we tore everything out of our gorgeous garden and added some magically wonderful, organic compost from Singh Farms (if you're in the Phoenix area, you have to visit Singh Farms - coolest place ever).


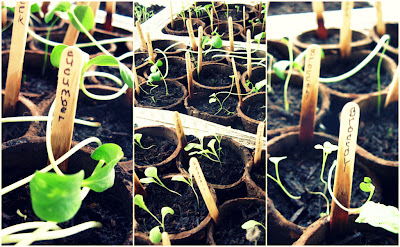
My mom has been busy preparing some precious little seedlings and will transfer them to the garden when they're ready. We'll be growing a variety of lettuce, cucumbers, broccoli, leeks, radish, garlic, parsley, and basil among others.


The boys and the chickens loved having our company outside while we worked. Isn't Flo getting huge?? She is such a gorgeous hen.


Now that the weather is cooler, I had no excuse not to clean out the coop over the weekend. We shoveled every last speck of chicken bedding and put it in our compost pile (chicken poop is like gold for the garden!). We then hosed out the entire coop and laid down diatomaceous earth and fresh bedding. This was a dusty, stinky, messy job but it will keep our chickens happy and mite free. I was especially thankful for the Wellies I got for Christmas. It definitely looks like they've been broken in.


How about you all? What are you doing to prepare for a fall harvest?

A Not So Spooky Ghost

Thursday, September 9, 2010
Oliver has been obsessed with ghosts the past few months. According to Oliver, there is a ghost in my car, in the bath tub, a few in his room, etc. Since we had some free time together while Finley was at preschool this morning, I thought we'd try to whip up a ghost doll of his own. This little guy was easy peasy to make and only took about 30 minutes.


I didn't really think to document the details as I went along to turn it into a tutorial but here are the simple steps I followed:
  • I took a half yard of white eco-fi felt (40% off right now at Joann's) and folded it in half.
  • With a fabric pen, I free handed a ghost on the felt. I am terrible at drawing but a ghost is super simple - you can't really mess it up.
  • Cut the ghost out (you should have two ghost pieces since the felt is folded in half)
  • I drew some eyes and a mouth on a small piece of heat n bond (any fusible webbing will do - just follow the instructions on the package)
  • Iron the heat n bond eyes and mouth on a small piece of black felt.
  • Cut out the eyes and mouth and iron on to the face area of one of your ghost pieces.
  • If you use a heavy duty fusible webbing you can probably skip this step but for durability, I sewed around the edges of the eyes and mouth.
  • Pin the two ghost pieces together with the ghost's face facing in and sew. Be sure to leave about two inches open.
  • Turn your little ghostie right side out and stuff with fiber fill.
  • Stitch the opening closed.
Seriously, easy stuff. And Oliver couldn't be happier with the result. His little ghostie hasn't left his hand for the past two hours.

Heading to Oklahoma and Sydney!

Tuesday, September 7, 2010
I have been up to my eyeballs in wholesale orders lately (hence my sporadic posting here). I recently finished up a large order for a brand new children's boutique in Sydney, Australia called Angel and Ivory. Melissa, the owner of Angel and Ivory, is a doll and was so much fun to work with. If you happen to be strolling around Sydney (doesn't that sound nice?) be sure to check out this darling new store.


Angel and Ivory
2-6 Birmingham Street
Alexandria
Sydney
NSW 2015
Australia
 
I'm also finishing up an order for an existing client of mine, Amber from The Funky Zebra Boutique in Oklahoma. Amber is a blast and is always choosing the most wild color combinations for my designs.  For all things fun, bright, and girly, be sure to visit her store.


The Funky Zebra Boutique
209 West Main Street
Weatherford, OK 73096

Now that these orders are under my belt, I have a ton of Halloween projects that I'm planning to attempt. Be sure to check back for the results and tutorials soon.

DIY Chalkboard Bubbles {oh happy day}

Thursday, September 2, 2010
I came across this adorable and clever tutorial from oh happy day while browsing one of my favorite crafty blogs, Be Different Act Normal. These look ridiculously fun and easy to make and the best part is that the oh happy day gals managed to make them for under $12!


I am totally going to try these this weekend. For the full post on how to make these chalkboard bubbles, head on over to oh happy day.