DIY Chevron Stripes Applique

Monday, January 30, 2012
A couple of months back, my friend Kim from The TomKat Studio asked me if I could create some little chevron one pieces for a shower she was working on for a friend. I love being able to contribute to Kim's amazing projects so I was stoked to help her out with this.


I created a fun little trio to coordinate with her darling collection (available in her shop soon!) and thought I'd document the process so you all can make your own. If you've already tried some of my applique tutorials, this one will be a breeze!

What you'll need:
  • Blank one piece, t-shirt, tank, etc. (pre-washed for shrinkage)
  • Sheet of felt in the color(s) of your choice - for kids' projects, I strongly recommend eco-fi felt by Kunin. It's made from recycled bottles and holds up really well in the wash.
  • Heat n Bond Lite or other fusible webbing
  • Scissors
  • Sewing machine *or* embroidery floss and needle
  • Chevron template (available here)


Getting Started:

Since I use Heat n Bond, my instructions will follow Heat n Bond's instructions. If you are using a different fusible web, simply change out my instructions with the instructions on the package.

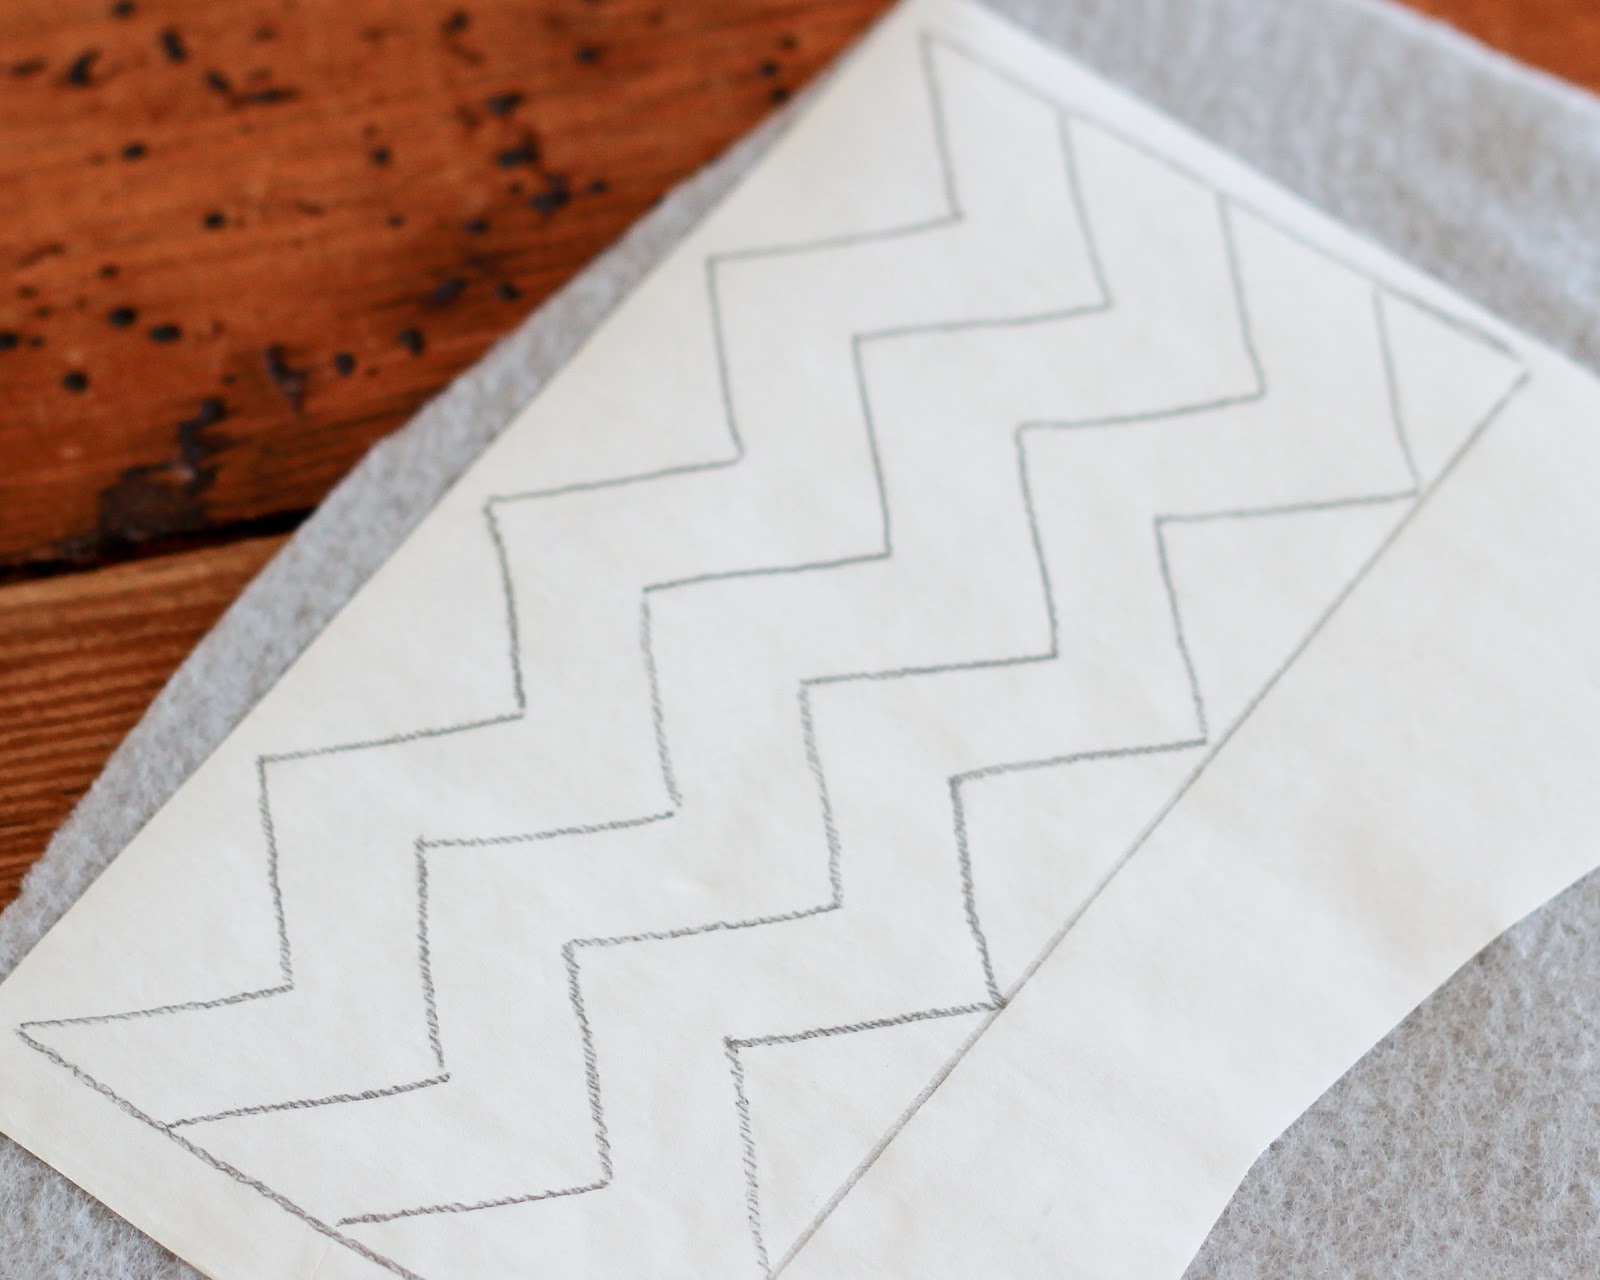
Print out your template and place it under your fusible webbing. Trace the pattern with a pencil. You can make the pattern as wide as you like. Since this is a small one piece, I traced the pattern twice (putting it side by side). See below:


Next you'll want to iron your chevron webbing onto your felt or fabric. For Heat n Bond, set it on the "wool" setting (NO STEAM). Iron the design onto the felt or fabric for about 3 or so seconds so it looks like this: 


Carefully cut out your chevron stripes.


Take the stripes and peel off the wax paper layer from the back. Place the stripes exactly where you want them on the t-shirt with the glossy/fusible webbing side face down. Iron the appliques on to the t-shirt pressing for about 10 seconds. I like to place a scrap piece of fabric over the appliques while pressing just to be safe. Again be sure to use the wool setting with no steam. Check to be sure that the appliques are firmly adhered to the shirt.


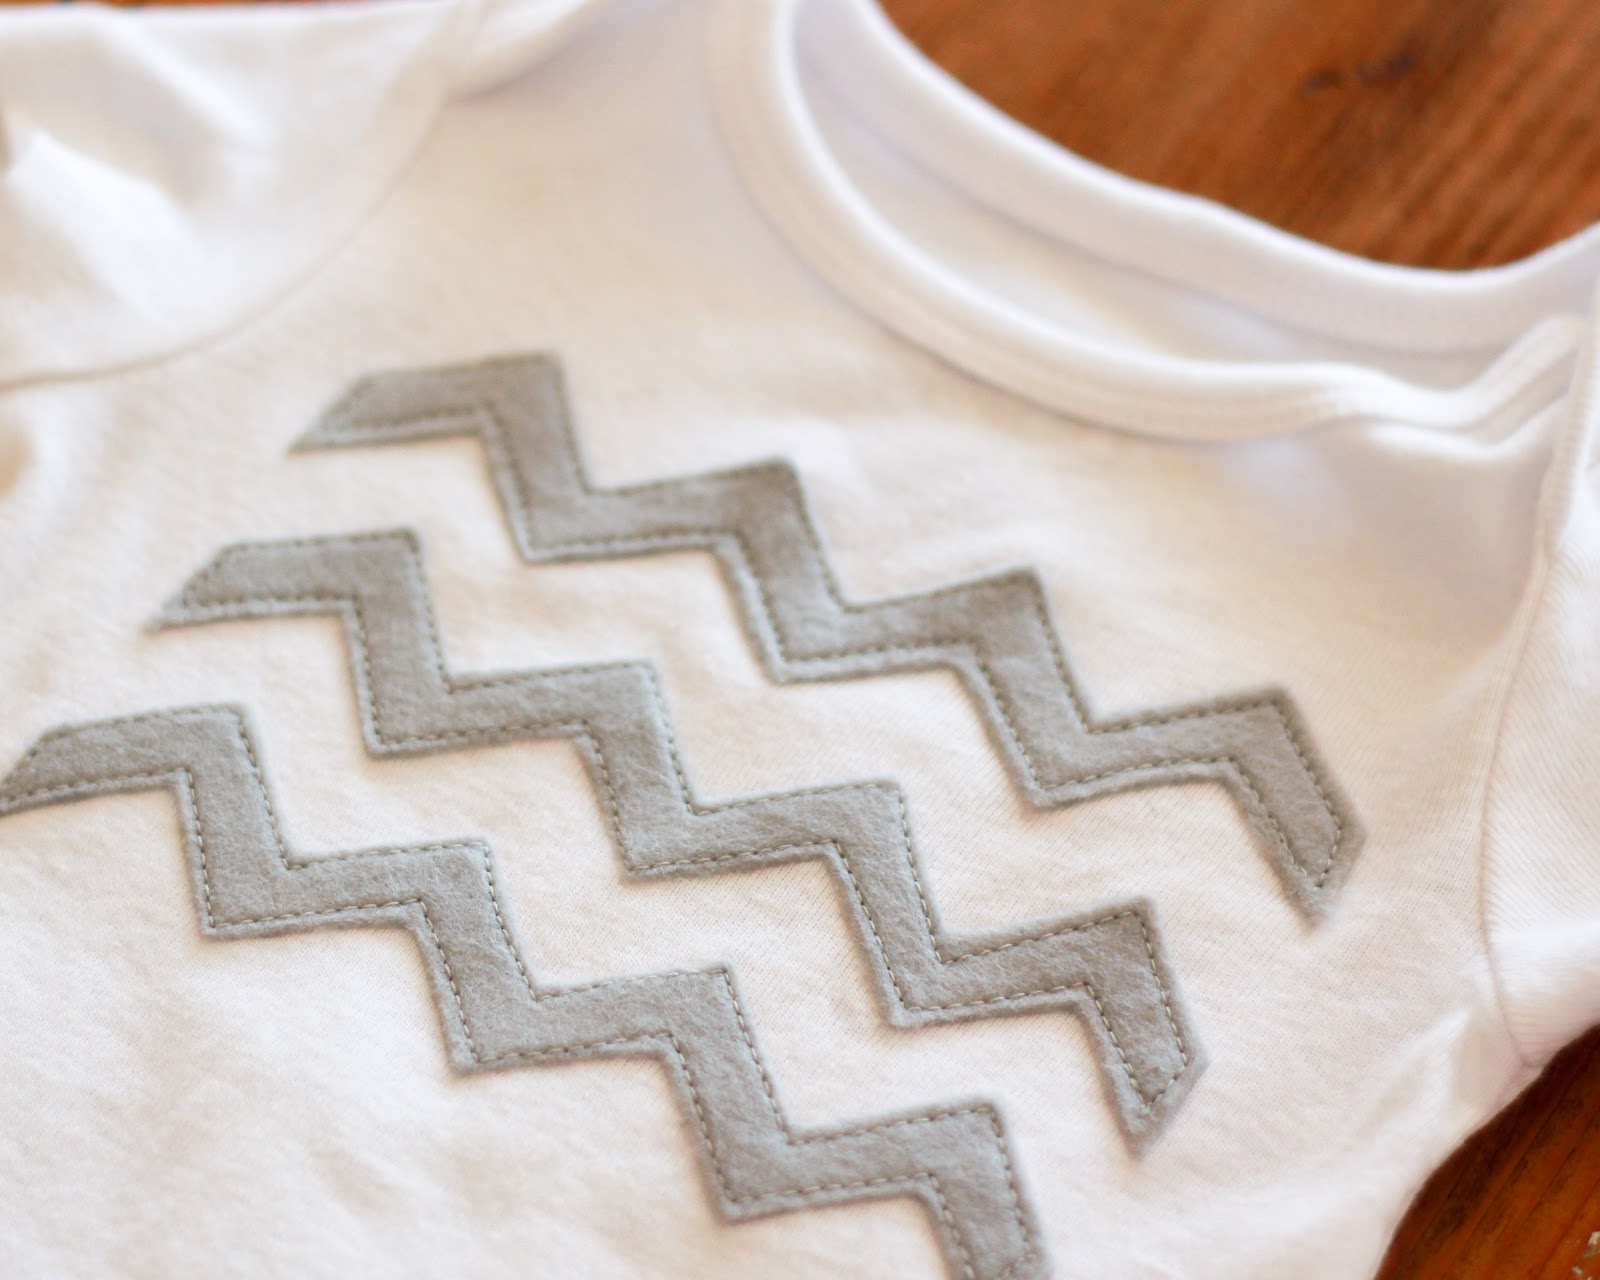
At this point, you can either hand stitch the stripes using a basic straight stitch (great tutorial here) or you can use a sewing machine. I usually prefer to hand stitch but for this project I used my machine. If you use your machine, you'll do a running stitch about 1/8th of an inch inside the border of each chevron stripe.


Once you've finished sewing the stripes, you're finished! You can sew up a sweet trio of these for a really cute gift or make some fun little pieces for your own kiddos. The little one piece below also coordinates with the The TomKat Studio's collection coming out soon. I simply drew the design with a ruler right onto the fusible webbing and appliqued a heart on top.


I loved how these turned out so much that I decided to make some for my little guys. Oliver calls this his Charlie Brown shirt.


As always, if you get stuck or have any questions, don't hesitate to comment here or send me a message at finleyandoliver@gmail.com and be sure to check back in with The TomKat Studio soon for the debut of the shower and the new collection.

DIY Puffy Hearts {+ a mustache}

Tuesday, January 24, 2012


When I heard that my friend Laura of Laura Winslow Photography was doing Valentine's mini sessions, I asked her if she would like me to make her some props that she could use. I'm always looking for an excuse to create something so I was stoked when she gave me an enthusiastic *yes* and requested that I do something in felt. Like I'd use anything else - I have a major love affair with felt.

Image via Laura Winslow Photography

I know Laura's style and I knew where she'd be shooting so I whipped up some fun, festive, and bright puffy hearts on a stick. I know, I know - not another (fill in the blank) on a stick. But seriously, these are pretty cute and are really easy to make. Not only do they make great photo props, but they'd also make super cute (sugar free) Valentine's with a fun little note or printable tied around it. My boys think they make great swords.

Here's what you'll need:
Scissors
Sewing Machine
Sheets of felt in the colors of your choice (One sheet of felt will make two puffy hearts)
Thin wooden dowels (available at your local hardware or craft stores)
Fiberfill
Coordinating thread
Hot glue gun
Sewing Machine
Heart template- download here

Getting Started:

Cut out the heart template. 

Fold your sheet of felt in half and pin the heart template to your felt. Cut out the heart (you'll have two felt hearts).


Take the two sides of your heart and pin them together. (The two red pins at the bottom of the heart mark where I start and stop sewing with the machine).


Sew your hearts together but leave the bottom part of the heart open so that you have enough room to turn your heart.


Turn your heart inside out. You can use scissors, a chop stick, or a knitting needle to make sure it's completely pushed out in the corners.


Stuff your heart with fiberfill. You want it full but not so full that you won't be able to stitch it closed.


Take your dowel and place it in the center of the heart. Be sure it's pushed up far enough so you don't have a wobbly heart. Wobbly hearts aren't any fun.


Place a dab of hot glue inside of the heart on the dowel so that it won't slip out.


Take your embroidery floss (I use two strands for this) and thread your needle. Starting on one side of the dowel, do a simple whip stitch to close up one side of the heart. (If you're wondering what the heck a whip stitch is, click here.)


Then start on the other side of the dowel and stitch up the other side.

Voila! A puffy heart on a stick! As always, please don't hesitate to message me at finleyandoliver@gmail.com if you get stuck on something.


For the little guys who may not be into hearts, here is a template you can use to make a puffy mustache on a stick. I know that mustaches are so 2010 and I should let the trend fade away, but Finley and Oliver think they are a blast to play with and I couldn't resist. Just follow the same directions as you would for the heart but cut out the mustache instead.


Annual Garden Party for the Chickens

It's that time of year again when our beautiful fall/winter garden has gone to seed and we need to start preparing for our spring/summer garden. We usually keep our garden covered with netting to keep the girls out but once a year, we take the net off and let them go to town.


We salvaged what we could of the veggies and gave the girls access to the rest. 


They'll have a few weeks to prepare our soil for us (by pooping and scratching) and then we'll start getting our transplants ready to plant. Because of our climate, we are able to plant our spring garden earlier than most regions.


The older hens were in the garden too but they are a bit camera shy these days.


The best part of the upcoming garden season is that we now have two of these beauties! My mom recently celebrated her 70th birthday and for her gift, my siblings all got together (along with the grand kids) and built my mom another raised bed - pretty much identical to this one. I'm considering myself very lucky that my mom lives with us and loves to spend her time outdoors with her garden. I did not inherit the green thumb that runs in our family so I am happy to reap mom's rewards.


Is anyone else making plans for their spring garden yet?

DIY Valentine's Banner

Thursday, January 19, 2012
I never really got into Valentine's Day until I had kids. Once I had my little guys, it was on.


This year I thought it would be fun to have little photo shoot so I could send some Valentine's cards to the family. And of course a shoot wouldn't be fun without some cool props to go along with it so I whipped up this ridiculously easy little Valentine's Banner. It took me less than 30 minutes and cost around $5.00.


What you'll need:

1/3 yard of burlap (I picked it up on sale at Joann's for $2.99 per yard)
One sheet of felt in color of your choice (I prefer eco-fi which is about $0.30)
Heat n Bond Ultra (or other fusible webbing)
Yarn or Twine (2 to 3 yards)
Tapestry Needle (or any needle with an eye big enough for yarn or twine)
Scissors
Pencil and one sheet of paper for triangle template
Ruler 

**Since I use Heat n Bond, my instructions will follow Heat n Bond's instructions. If you are using a different fusible web, simply change out my instructions with the instructions on the package.

Getting Started:

Using your ruler, draw out a triangle template for your banner on the piece of paper. My triangle is 6 inches on the long sides and 4 inches on the short side. Cut it out and pin it to your burlap.

 Cut out how ever many triangles you'll need from the burlap. My banner has five triangles.


Next you'll want to draw your heart on the heat & bond. You can free hand the hearts on with a pencil. I prefer to draw a heart on a piece of paper and then place it under my Heat & Bond to trace it. Doing it that way ensures that my hearts are all the same.


Next you'll want to iron your heart webbing onto your felt or fabric. For Heat n Bond, set it on the "wool" setting (NO STEAM). Iron the design onto the felt or fabric for about 3 or so seconds so it looks like this: 


Cut out the hearts. They will be felt on one side and have a paper backing on the other.


Take the hearts and peel off the wax paper layer from the back. Place the hearts exactly where you want them on the triangles  with the glossy/fusible webbing side face down. Iron the hearts on to the triangles pressing for about 10 seconds. Again be sure to use the wool setting with no steam. Check to be sure that the hearts are firmly adhered.


Take your yarn or twine and cut off three times the length that you want your banner to be. If you want your banner to be 3 feet wide, cut off 9 feet. Be sure to leave a long enough tail so that you will end up with enough length at each end of the banner to hang it or hold it.  Thread your needle and do a simple straight stitch along the top of the burlap (leave about a half an inch clearance from the top). My stitches are about half an inch long and since my yarn matches my burlap, it is *very* forgiving.


Stitch all of your triangles on to your yarn or twine and you are finished!


Using this exact same technique, you could make a banner with other shapes or even letters. (If you do this with letters or numbers, you'll need to trace them onto your fusible webbing in reverse.)


If you get stuck or have any questions, don't hesitate to contact me (finleyandoliver@gmail.com) and I'll do my best to help.


Happy Valentine's Day!


Shattered Circus Dreams

Monday, January 16, 2012
Do you all remember when my husband gave me a certificate for trapeze lessons for my birthday? Well six months later, I finally got up the courage to do it. I was scared out of my mind.


Once we arrived at Trapeze U, they got my belt on and gave me a quick rundown of what I was expected to do. Hook my knees over the bar and let go? I was the monkey bar queen in elementary school. I had this.


I got to the top and stood on what seemed like the world's tiniest platform where they clipped me in and gave me another quick rundown of what to do. (Look how high I am!).


Ready, set, go! (or "hep" as they say in trapeze speak). The following picture is terrible but I think the hilarious expression on my face says it all. Black Swan I am not.


I tried with every ounce of strength I could muster but I couldn't get my legs up and get my knees hooked over the bar. After hoofin' it up that ladder three more times and still not getting it, I was feeling super spent and super defeated.

My dear friends Laura and Jill were planning to show up and give me support (you gals rule!) but I quickly texted them both and told them to stay home. There is absolutely no way I'd want anyone to witness my lack of trapeze talent. I mean seriously - look at what a mess I was.


At this point, I was ready to quit and quietly watch the other flyers.


Coach Dylan wasn't having that. He gave me a much needed pep talk and pointed out that I was making a simple mistake. I was trying to lift my legs at the wrong moment and the momentum wasn't working to my advantage. 


So...I decided to give it one last shot.


And I did it!


Taking Dylan's advice made the knee hook (or whatever the heck it's called) so much easier. There was a small crowd at the class and I could literally hear the ladies on the side breathe an audible sigh of relief followed by cheers when I got my knees hooked. I was pretty pathetic and I'm sure they felt sorry for me. 

I did it a couple more times and each time I was able to get my knees up. I can't say that I did it with any style or grace but I was just stoked to finally be doing it! Towards the end of the class, they thought that I would be able to attempt another trick. (A little ambitious of them, maybe?). They explained that I would be doing the whole knee hook thing again but when I let go with my hands, I'd swing over to the other instructor and he would catch me. Seriously!?! If I can barely hook my knees how on earth am I going to pull this off?

So I climbed up to the top of the world's teeniest platform for the 10th time (I was wiped) and went for it.


I DID IT!!! I seriously did it.  Such an incredible, amazing feeling. I had to sit down and take it all in. 


While I'm pretty sure I'm not going to run off with the circus anytime soon, I would take more classes through Trapeze U in a heartbeat and am looking forward to signing up again soon. Dylan and the rest of the staff were amazing - they could clearly sense my fear and self defeatist attitude and gave me the encouragement and tools I needed to accomplish something I never thought I'd be able to do. 

888.872.7101